Smartphone Travel Photography Tips for Beginners
Ever scrolled through social media and felt a pang of envy at those breathtaking travel photos? You know, the ones that make you feel like you’re right there, breathing in the exotic air? What if I told you that you probably already own the most powerful tool you need to create those kinds of shots? That’s right, your smartphone. Forget expensive camera gear for a moment; these travel photography tips for beginners using smartphones will help you capture your adventures like a pro, right from your pocket.
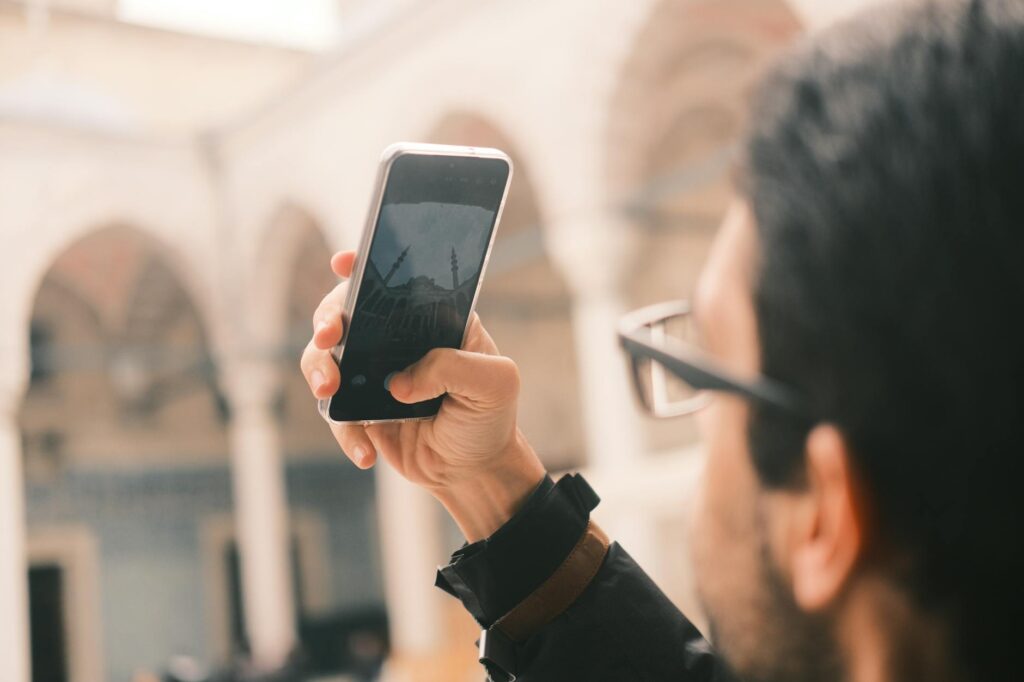
For years, I lugged around heavy camera equipment, convinced that was the only way to get good travel photos. Then, about three years ago, while on a backpacking trip through Southeast Asia, I decided to rely solely on my phone. The results surprised me. Not only was I lighter on my feet, but the photos I captured were sharp, vibrant, and told the story of my journey beautifully. It taught me that great photography is less about the gear and more about the eye. And with today’s smartphone cameras, that eye is all you really need.
Table of Contents
- Master Your Phone’s Camera Settings
- Improve Your Composition
- Lighting: The Key to Great Smartphone Photos
- Essential Editing Apps and Techniques
- Telling Stories with Your Travel Shots
- Common Smartphone Photography Mistakes to Avoid
- Your Next Steps to Better Travel Photos
Master Your Phone’s Camera Settings
Before you even think about composition or lighting, get to know your phone’s camera app inside and out. Most modern smartphones, even budget-friendly models released in 2025 and 2026, have incredible capabilities built into their default software. I always recommend exploring every setting available. Features like grid lines, HDR (High Dynamic Range), and focus/exposure lock are your best friends.
Grid lines are invaluable for composition, helping you nail the rule of thirds without conscious effort. HDR is fantastic for scenes with both bright skies and dark shadows – it captures multiple exposures and blends them for a more balanced image, preserving detail in both the highlights and shadows. Tap and hold on your screen to lock focus and exposure; this prevents the camera from readjusting as you recompose, which is incredibly helpful when shooting in tricky lighting conditions or trying to capture fast-moving subjects. Many phones also allow you to shoot in RAW format, which gives you much more flexibility during the editing process, though it requires more storage space and editing knowledge.
Improve Your Composition
Composition is how you arrange the elements within your frame. It guides the viewer’s eye and tells the story of your photograph. For beginners, understanding a few core principles can dramatically elevate your images.
The ‘rule of thirds’ is a classic for a reason. Imagine your screen divided into nine equal squares by two horizontal and two vertical lines. Place your main subject along these lines or at their intersections. This creates a more balanced and visually engaging image than simply centering everything. Leading lines are another powerful tool. These are natural lines within the scene—a path, a fence, a river—that draw the viewer’s eye into the photo, often leading towards your subject. Look for these elements in your environment.
Don’t be afraid to change your perspective. Instead of always shooting from eye level, try getting low to the ground for a dramatic angle or climb up high for a bird’s-eye view. I once photographed a market in Vietnam from an upstairs balcony, and the overhead shot of the bustling activity was far more compelling than any eye-level photo I could have taken. Experimentation is key to finding unique viewpoints.
Lighting: The Key to Great Smartphone Photos
Light is the foundation of photography. Understanding how to work with it, even with just your phone, is essential. The best light for photography is often called ‘golden hour’ – the period shortly after sunrise and before sunset. The light is softer, warmer, and creates beautiful long shadows that add depth and mood to your images. This is especially true for capturing architectural details or portraits.
Midday sun, on the other hand, can be harsh, creating strong, unflattering shadows and blowing out highlights. If you must shoot in harsh midday light, actively seek out shade. This could be under a tree, an awning, or even a building. Shooting in open shade provides soft, even light that is very forgiving. Backlighting can also create dramatic silhouettes or a beautiful rim light around your subject, but be mindful of your exposure settings to ensure you capture the effect you want. For instance, when I visited the ancient temples of Angkor Wat in Cambodia, shooting during the golden hour allowed me to capture the stone structures bathed in a warm, ethereal glow. It made a world of difference compared to the stark, washed-out look of midday shots.
Important Note: Avoid using your phone’s digital zoom whenever possible. Digital zoom simply crops and enlarges the image, severely degrading the quality. If you need to get closer to your subject, physically move closer. If that’s not feasible, it’s better to shoot without zoom and crop the photo later during editing. Most 2026 smartphone models offer impressive optical zoom capabilities, so familiarize yourself with your phone’s specific zoom features.
Essential Editing Apps and Techniques
Editing is where your smartphone photos can truly transform. While your phone’s built-in editor is a good starting point, dedicated apps offer far more control and creative possibilities. Apps like Adobe Lightroom Mobile, Snapseed, and VSCO remain popular and powerful, often available for free, and are incredibly intuitive for beginners. Newer AI-powered editing tools are also emerging, offering quick enhancements for specific issues like noise reduction or color correction.
Start with basic adjustments: brightness, contrast, saturation, and white balance. You can correct exposure issues, make colors pop, or establish a specific mood. Sharpening can add definition, but use it sparingly – over-sharpening looks unnatural and can introduce artifacts. Cropping and straightening can significantly improve composition after the fact. Remember, the goal of editing is typically to enhance the photo, not to drastically alter reality.
Telling Stories with Your Travel Shots
Beyond a single beautiful image, consider how your photos can tell a story about your travel experience. Capture a series of shots that show the progression of a day, the details of a local market, or the interactions between people. Think about the environment, the culture, and the emotions you want to convey. Include wide shots to establish the scene, medium shots to show action, and close-ups to highlight details.
The best travel photography goes beyond just documenting a place; it captures the feeling of being there. Consider the people you meet, the food you eat, and the moments of quiet observation. Even a simple shot of your passport next to a local delicacy can add a personal touch to your travelogue. Since 2023, smartphone video capabilities have also advanced dramatically, allowing for short clips that can add dynamic storytelling to your still images.
Common Smartphone Photography Mistakes to Avoid
- Over-reliance on filters: While filters can be fun, using them excessively can make your photos look amateurish and dated. Learn basic editing first.
- Ignoring the background: A cluttered or distracting background can ruin an otherwise great shot. Take a moment to check what’s behind your subject.
- Shooting in low light without care: Smartphones struggle in very low light. Use night modes if available, find extra light sources, or embrace the grain for a stylistic effect.
- Not backing up photos: Losing travel photos is heartbreaking. Utilize cloud storage services (like Google Photos, iCloud, Dropbox) regularly.
- Forgetting about sound when shooting video: If you’re capturing video, be mindful of ambient noise. Using an external microphone, even a simple lavalier mic for your phone, can make a huge difference in audio quality for your travel vlogs.
Your Next Steps to Better Travel Photos
The journey to becoming a better smartphone travel photographer is ongoing. Practice consistently, even in your own neighborhood. Experiment with different settings, apps, and techniques. Study the work of photographers you admire, paying attention to their composition and use of light. Most importantly, have fun and capture the moments that matter most to you. With the technology available in 2026, your smartphone is a powerful tool for creating lasting memories.
Frequently Asked Questions
What is the best smartphone camera for travel photography in 2026?
As of April 2026, top-tier smartphones from brands like Apple (iPhone 16 series), Samsung (Galaxy S25 series), and Google (Pixel 9 series) offer exceptional camera systems with advanced computational photography, improved low-light performance, and versatile zoom capabilities, making them excellent choices for travel photography. However, many mid-range and even some budget phones released in late 2025 and early 2026 also produce impressive results, proving that excellent travel photos are achievable without the most expensive devices.
How can I improve my smartphone photos in low light?
For low-light smartphone photography in 2026, utilize your phone’s dedicated Night Mode or Low Light mode, which uses longer exposure times and computational processing. Find any available light source, such as streetlights or indoor lamps, and position your subject near it. If possible, use a tripod or lean your phone against a stable surface to prevent camera shake during longer exposures. Some editing apps also offer advanced noise reduction tools that can help clean up low-light images.